
Tools as a Service: A Modern Approach to Embedded DevOps
Ditch dependency hell and manual setups. Learn how to build the Tools as a Service stack, a container-first architecture for scalable embedded development.


"It Works on my Machine!"
"It works on my machine!", the four words that usually mock developer's struggle with inconsistent environments. We have all been there, a wrong library version, an unexpected OS update, or a missing dependency, and suddenly the development environment is broken. If you are relying on a remote devbox with physical tools accessible over the network, the stakes are even higher, your team is blocked, and you are stuck rebuilding everything from scratch.
But what if you could eliminate "it works on my machine" for good? What if your tools were as easy to deploy, update, and scale as a cloud service? These were the exact questions I had when building a remote devbox to develop and debug my systems whether from home, the office, or even the woods.
That is the core idea behind Tools as a Service (TaaS), a concept inspired by Software as a Service, but tailored for embedded DevOps and remote development.
TaaS for Remote Embedded DevOps
TaaS replaces manual labor with a scalable, controlled, and portable workflow. It’s built on three core principles:
- Portable Foundation: Encapsulate prebuilt and custom tools in Docker containers for identical environments across any machine.
- Private Infrastructure: Host your own Debian and Docker registry on Gitea for full control over tool versions and updates.
- Remote Node Architecture: Use low-power machines (like Raspberry Pis) as always-on hardware gateways, accessible from anywhere in the world.
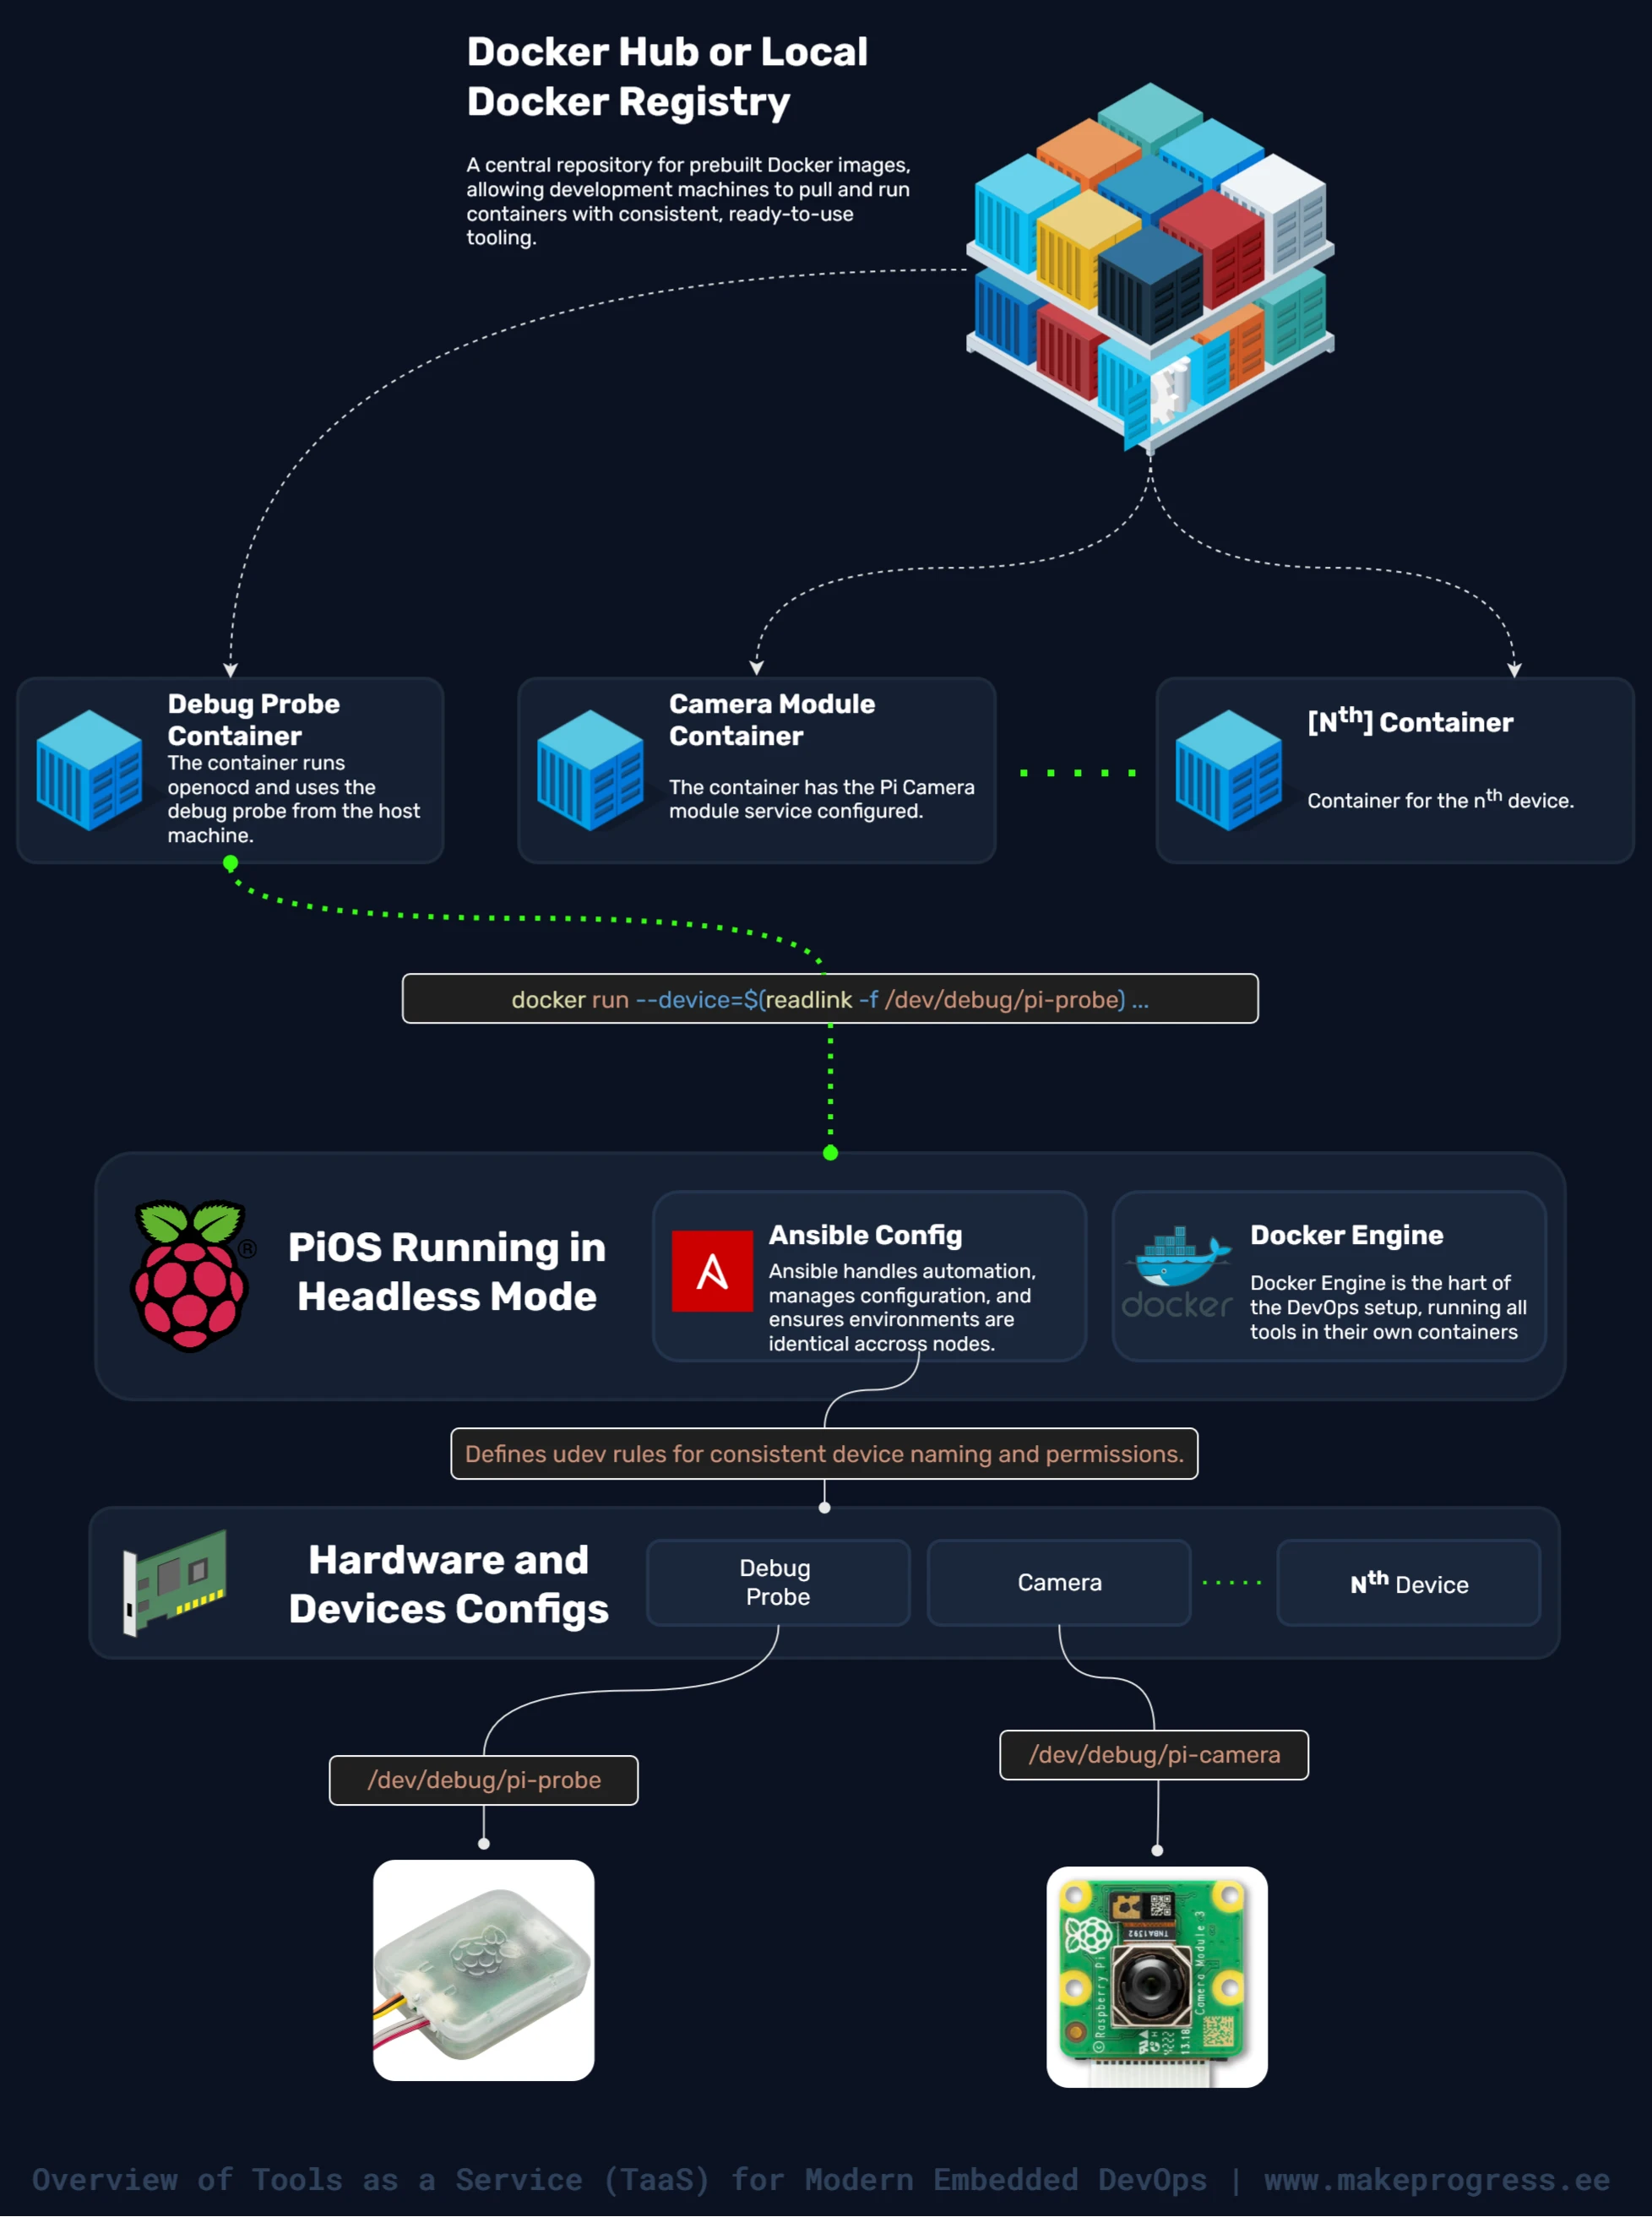
The TaaS Roadmap
This architecture didn't happen overnight. It's the result of a step-by-step journey to creating a easily managable devbox by using OpenOCD tool as an example.
Phase 1: Fundamentals and Going Remote
We started by breaking free from vendor IDEs, learning to communicate directly with microcontrollers (STM32, RP2040) using OpenOCD. Then, we moved debugging to the network, turning a Raspberry Pi into a remote debug server. Suddenly, our hardware was accessible from anywhere, no more being tied to a lab bench.
Phase 2: Take Control of Your Tools
Pre-built binaries available in the apt registry of our Raspberry Pi remote server are often not the latest and greates. So, we took control by cross-compiling tools for ARM/AMD64 on high-performance machines, then packaging them into clean, versioned Debian packages. No more make install chaos, just apt install and you are ready to go.
Phase 3: Automate and Isolate
The final piece? Full automation and isolation. We built a private Gitea registry to host our custom packages, then containerized everything with Docker. Now, tools spin up in seconds, hardware integrates seamlessly into containers, and "it works on my machine" is a relic of the past.
Phase 4: Building on the Core (Ongoing!)
With the core TaaS components in place, we’re now expanding the concept further. The goal is to make embedded development as seamless as cloud services, without sacrificing control or performance.
What's Next?
This page will serve as the hub for all future TaaS posts. As we continue to expand the architecture, adding new tools, refining workflows, and exploring automation, we’ll update this pillar post with links and insights. Whether you’re here for the first time or checking back for updates, this is your go-to resource for modern embedded DevOps. Stay tuned! ٩(^ᗜ^ )و ´-

Including External Libraries in CMake Projects
Learn how to use CMake’s FetchContent module to automatically download and integrate libraries like CMSIS into your embedded projects, eliminating the hassle of manual copying and updates.
Cortex-M0 Profiling: How to Trace Without Hardware Support
The ARM Cortex-M0 and M0+ lack hardware tracing features like SWO, ETM, and ITM, so how do you profile code on them? In this post, I explore software-based techniques to get deeper insight into performance and debugging on these resource-constrained MCUs.
How to Move RTT to a Custom RAM Section in Embedded Rust
Learn how to place RTT buffers and the control block into a fixed RAM section in embedded Rust. This guide covers linker script changes, custom RTT initialization, and setting up a reliable RTT print channel.
Whether you're building something new, fixing stability issues, or automating what slows your team down — we can help.