Remote Debugging with OpenOCD on Raspberry Pi
Learn how to turn a Raspberry Pi into a remote debugging server for the RP2040 using OpenOCD, a complete with step-by-step setup and instructions for building OpenOCD from source to resolve hardware compatibility issues.

In an earlier post, we looked into OpenOCD and how it is used to interface with a debug probe and a target. In that setup the debug probe was directly connected to our computer and we could do local debugging. But what if we need to debug remotely, whether we are in the office or at home? This was exactly my goal, I wanted to have a small devbox at home, equipped with a Pi Pico board and a debug probe (with potential for more devices later), and experiment with small ideas. So, let's get started!
Road to Remote Debugging
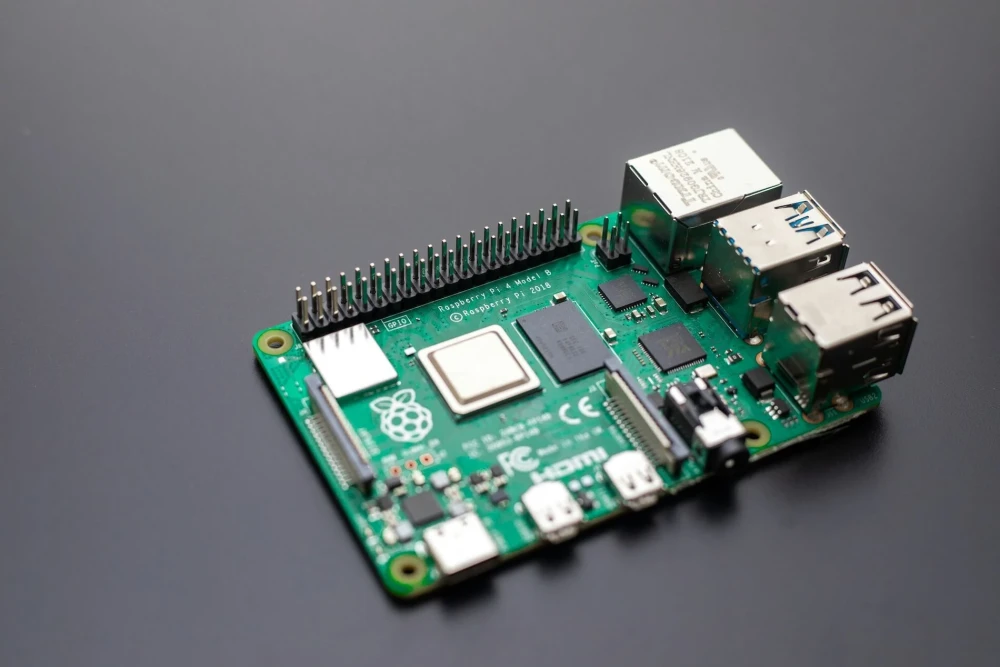
There are couple of ways how we could achieve remote debugging, we could have a separate PC (a laptop or desktop machine) where we have our project files and hardware connected; and we would need to use SSH to connect to it and do remote development that way. But this is not optimal as keeping a full desktop running just to do some experiments now and then seems wasteful. On the other hand, a low power machine would not have the performance to quickly build our firmware. The ideal path would be for us to have a low power remote machine, for just handling the flashing and debugging part, but use a more powerful computer to compile and build the code. I had a Raspberry Pi 4 laying around and it fits perfectly for this application! First lets install openocd on the Pi as we did last time for Ubuntu (SSH into the Pi or use a monitor and keyboard):
sudo apt update
sudo apt install openocd
Next we need to connect our hardware, debug probe and the Pi Pico board. Lets first try out that our device work locally in the Pi, for that we need to provide the RP2040 target config and our debug probe config, in my case its a pi debug probe, which is based on the CMSIS-DAP interface.
openocd -f interface/cmsis-dap.cfg -f target/rp2040.cfg -c "adapter speed 5000"Excellent!!, everything is working, now lets make the GDB server accessible from another machine in our network! For that we need to use an additional command called bindto. It will make OpenOCD listen to all available network interfaces, by default OpenOCD will listen on the loopback interface only or in other words the localhost.
$ openocd -f interface/cmsis-dap.cfg -f target/rp2040.cfg -c "adapter speed 5000" -c "bindto 0.0.0.0"
Open On-Chip Debugger 0.12.0
Licensed under GNU GPL v2
For bug reports, read
	http://openocd.org/doc/doxygen/bugs.html
adapter speed: 5000 kHz

Info : Listening on port 6666 for tcl connections
Info : Listening on port 4444 for telnet connections
Info : Using CMSIS-DAPv2 interface with VID:PID=0x2e8a:0x000c, serial=E6633861A3725538
Info : CMSIS-DAP: SWD supported
Info : CMSIS-DAP: Atomic commands supported
Info : CMSIS-DAP: Test domain timer supported
Info : CMSIS-DAP: FW Version = 2.0.0
Info : CMSIS-DAP: Interface Initialised (SWD)
Info : SWCLK/TCK = 0 SWDIO/TMS = 0 TDI = 0 TDO = 0 nTRST = 0 nRESET = 0
Info : CMSIS-DAP: Interface ready
Info : clock speed 5000 kHz
Info : SWD DPIDR 0x0bc12477, DLPIDR 0x00000001
Info : SWD DPIDR 0x0bc12477, DLPIDR 0x10000001
Info : [rp2040.core0] Cortex-M0+ r0p1 processor detected
Info : [rp2040.core0] target has 4 breakpoints, 2 watchpoints
Info : [rp2040.core1] Cortex-M0+ r0p1 processor detected
Info : [rp2040.core1] target has 4 breakpoints, 2 watchpoints
Info : starting gdb server for rp2040.core0 on 3333
Info : Listening on port 3333 for gdb connections
Info : starting gdb server for rp2040.core1 on 3334
Info : Listening on port 3334 for gdb connections
Info : accepting 'gdb' connection on tcp/3333
Info : Found flash device 'win w25q16jv' (ID 0x001540ef)
Info : RP2040 B0 Flash Probe: 2097152 bytes @0x10000000, in 32 sectors
Finally, we can move back to our development PC, and we have to modify our launch.json file to use the remote server.
First servertype must be set to external (remote debug server type) and we have to specify the GDB target, in other words our Raspberry Pi IP (or as in my case the hostname devbox) and the port (default port is 3333).
"servertype": "external",
"gdbTarget": "devbox:3333",
Now we are all setup and can start debugging!! Awesome...wait what?!

Oh man..our simple blinky program is not working. The code gets stuck in a while loop...
The snippet is from the Pico SDK (v2.1.1) src/common/pico_time/time.c, function starts at line 392 and the snippet starts at line 408.
while (!time_reached(t_before)) {
    uint32_t save = spin_lock_blocking(sleep_notifier.spin_lock);
    lock_internal_spin_unlock_with_wait(&sleep_notifier, save);
}
Its seems that the version of OpenOCD in the Debian registry is not working correctly for the RP2040 target. There seems to be a problem with the Timer peripherals.
Research suggests that the issue is with the OpenOCD code and an update would solve it. The problem is that there are no new official releases after 0.12.0-1 for now. This means we have to build OpenOCD from source!

Back to the Source!
To get this issue solved and our devbox up and running with RP2040, we need a newer version of OpenOCD. We could try xPack version (an unofficial maintenance releases of 0.12.0) and see if this resolves any of the issues, but instead of this lets build OpenOCD from source and get the latest and greatest version instead.
First of all, lets connect to our Pi (e.g. using SSH) and update the system, remove the previous version of OpenOCD and install all the required tools and libraries.
sudo apt update
sudo apt uninstall openocd
sudo apt install git libtool autoconf automake pkg-config libusb-1.0-0-dev libhidapi-dev libjim-dev
Some note worthy libraries are:
libusb-1.0–0-dev- This is the userlevel to USB library that many people use to talk to a variety of USB attached devices.libhidapi-dev,libhidapi-libusb0– This talks to USB devices that are using the HID (Human Interface Device) USB class when connected to our computer.libjim-dev- A development package that provides the necessary header files and static libraries for building applications that use the small-footprint implementation of the Tcl programming language
Next, we clone the latest version of the OpenOCD source code from the official repository (we use the Github mirror in this case). We use the --recursive to get any additional git submodules e.g. libjaylink.
git clone --recursive https://github.com/ntfreak/openocd.git
cd openocdRun the bootstrap script. Its primary purpose is to generate the configure script and other necessary build system files.
./bootstrapNext configure the Makefile by running the configure script with necessary options. We will enable the "CMSIS-DAP v1 compliant dongle (HID)" option as this is not automatically enabled (needed by some CMSIS-DAP debugger).
$ ./configure --enable-cmsis-dap
OpenOCD configuration summary
---------------------------------------------------
MPSSE mode of FTDI based devices                 yes (auto)
ST-Link Programmer                               yes (auto)
Espressif JTAG Programmer                        yes (auto)
CMSIS-DAP v2 compliant dongle (USB bulk)         yes (auto)
CMSIS-DAP v1 compliant dongle (HID)              yes
Nu-Link Programmer                               yes (auto)
......
Almost done, compile and install OpenOCD to the default path /usr:
make -j$(nproc)
sudo make install
Finally we verify the installation: This command should output the version of OpenOCD you just installed, confirming the installation (you might need to restart the terminal). The +dev-02098-g6872f7e40 indicates a development build. The appended g6872f7e40 is the Git hash of the specific source code revision it was compiled from.
$ openocd -v
Open On-Chip Debugger 0.12.0+dev-02098-g6872f7e40 (2025-07-28-19:45)
Licensed under GNU GPL v2
For bug reports, read
	http://openocd.org/doc/doxygen/bugs.html
Trying Again
After installing the latest OpenOCD, test it with your original configuration files and commands:
openocd -f interface/cmsis-dap.cfg -f target/rp2040.cfg "adapter speed 2000" -c "bindto 0.0.0.0"Lets try remote debugging again with out blinky firmware and... the Timer issue is now resolved. Now we can finally start experimenting with our dev board remotely!

What's Next?
Next up in the OpenOCD series, we'll simplify the build by creating binaries in a dedicated VM. We'll focus on cross-compiling OpenOCD for both AMD64 and ARM64 architectures.
Enjoyed This Post?
Love tinkering with embedded systems and hands-on projects? Join our email list, and we’ll share our latest posts, tips, and discoveries with you - no spam, just the good stuff!

Including External Libraries in CMake Projects
Learn how to use CMake’s FetchContent module to automatically download and integrate libraries like CMSIS into your embedded projects, eliminating the hassle of manual copying and updates.
How to Find the Memory Address of a Symbol in an ELF File
A quick and useful tip for locating symbol memory addresses in ELF files using arm-none-eabi-nm combined with grep—perfect for embedded debugging scenarios like setting up SEGGER RTT or inspecting linker placements and runtime symbols.

Getting Started with OpenOCD: A Beginner’s Guide for Embedded Developers
A beginner-friendly guide to installing, configuring, and using OpenOCD for flashing and debugging microcontrollers.
Whether you're building something new, fixing stability issues, or automating what slows your team down — we can help.